
Looking for a quick and easy way to bring the fun back into your kid’s birthday party? Or a creative project to entertain little ones with shorter attention spans?
These easy arts and crafts ideas are simple, fun, and perfect for all ages. With minimal supplies, you can create DIY magic and a whole afternoon of fun. Just be warned, fridge display space may be required indefinitely, no matter the results!
>> Book a Kid’s Arts and Crafts Party
Easy Arts & Crafts to do with kids
These easy arts and crafts are suitable for all ages and occasions. Whether you’re planning a party activity, looking for a rainy-day project, or just want to keep little hands busy after school, these ideas are fun, fuss-free, and full of creativity.
Paper Animals
Paper crafts are perfect if you don’t have a lot of time or materials. They can turn even the laziest afternoon into a fun easy arts and crafts session!
Why not transform an old cardboard box into a zoo full of animals? To create your own personal menagerie, you’ll need:
- Animal templates
- Paper
- Cardboard
- Paintbrush
- White Glue (or similar)
- Pipe cleaners
You can find printable animal templates with a quick online search, or sketch out your own!
Trace the templates onto cardboard and cut them out (grown-ups should handle the scissors). Then it’s time to get creative with colours!
Let your child paint their favourite animals and leave them to dry. While you wait, cut pipe-cleaner tails or tusks and glue them into place.
If you’ve gone for 3D designs, make small slits in the cardboard and slot the shapes together.
Coffee Filter Craft Cups
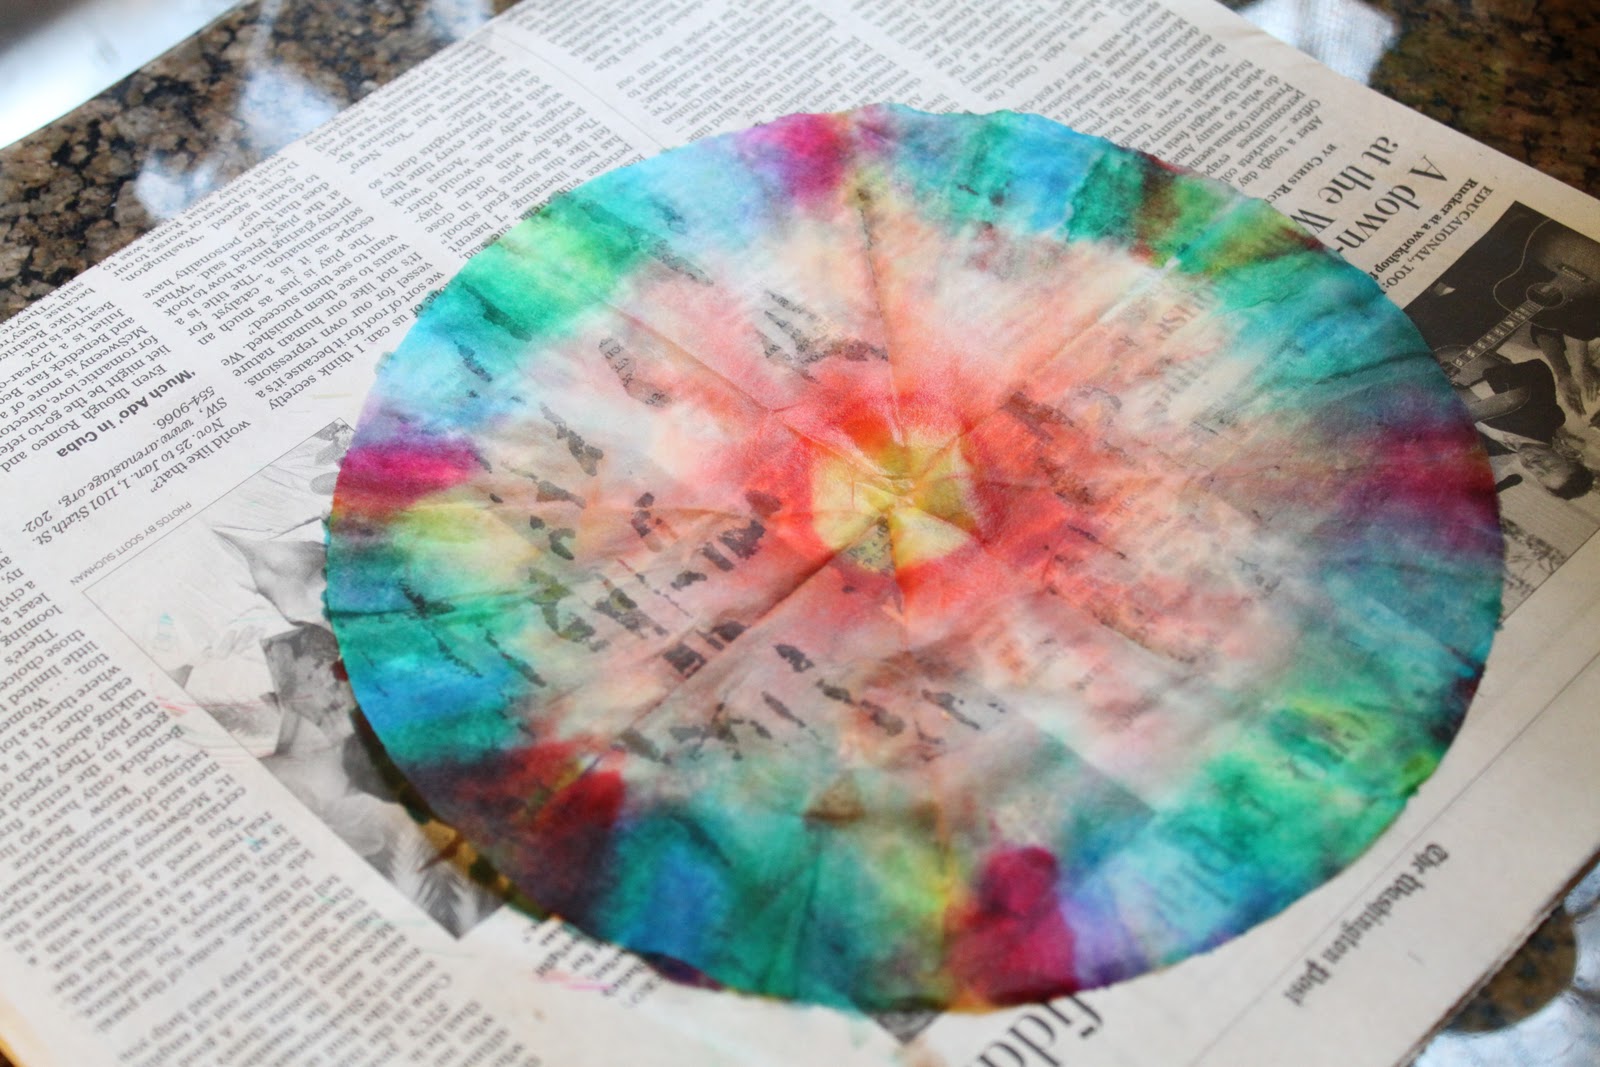
This one’s perfect for a rainy day at home or even as a spontaneous activity during a playdate. With just a few supplies, you can create colourful “tie-dye” effects without any of the mess.
For this easy arts and crafts activity, you’ll need:
- Coffee filters
- Round-edge scissors
- Non-permanent markers
- Spray starch
Start by trimming the edges of your coffee filters to create fun, wavy shapes.
Let the kids draw lines, spots, and colourful patterns on the filters using washable markers. Then, drape each one over an upside-down plastic cup (a yoghurt pot works well).
Spray lightly with starch until the colours begin to blend and the filter is damp. Leave it to dry, and voilà! You’ve got a beautiful piece of art that can be turned into a candle holder (just for display), glasses for imaginative play, or even decorations.
Alternatively, keep the filters flat and turn them into flowers or vibrant snowflakes.
Pasta Jewellery

There’s nothing more fun than creating your own accessories, and pasta crafts are an all-time favourite when it comes to easy arts and crafts.
To make your own necklaces and earrings, you’ll need:
- Small pasta shapes (like macaroni, penne, or short tubes)
- Food colouring
- Surgical spirit (or rubbing alcohol)
- Freezer bags with a seal
- Craft wire or string
- Scissors
To colour your pasta, pour 5 tablespoons of surgical spirit into a freezer bag and add about 15 drops of food colouring. Give it a gentle shake to mix, then add around half a cup of pasta. Seal the bag and let your child swirl it around to coat the pasta evenly. Let it sit for 10-15 minutes.
Lay the pasta out in a single layer (using a skewer or spoon) to dry completely. Once dry, you’re ready to create!
For necklaces: Thread the pasta onto cord or string and tie the ends.
For earrings or more detailed designs: Use craft wire to create shapes or layer different pasta pieces together.
The perfect mix of colour, creativity, and kitchen cupboard fun!
Homemade Playdough

Playdough is a boredom-busting classic, and making your own is a brilliant way to add even more fun. It’s one of the easiest arts and crafts activities to set up, and kids love choosing the colours and scents.
Here’s what you’ll need:
- 1 cup of bicarbonate of soda
- ¾ cup of water
- ½ cup of cornflour
- Food colouring (optional but advised!)
- A few drops of essential oil or lemon juice (optional, but again makes it smell so much nicer!)
If you want to make colourful and scented playdough, add 4-5 drops of food colouring and 2-3 drops of essential oils.
Start by mixing the cornflour, bicarbonate of soda and water in a saucepan before turning on the heat. Stir it together until smooth, then place the pan over a medium heat.
Let your child help stir the mixture (with supervision) until it starts to bubble slightly and thicken into a dough.
Once it’s ready, tip the dough onto baking paper and let it cool completely, it will be hot! You can knead it to speed up the cooling process, then add colour or scent if you fancy. Let your little ones pick their favourites.
Keep it stored in an airtight container for plenty more play ahead.
Crystal Geode Eggs
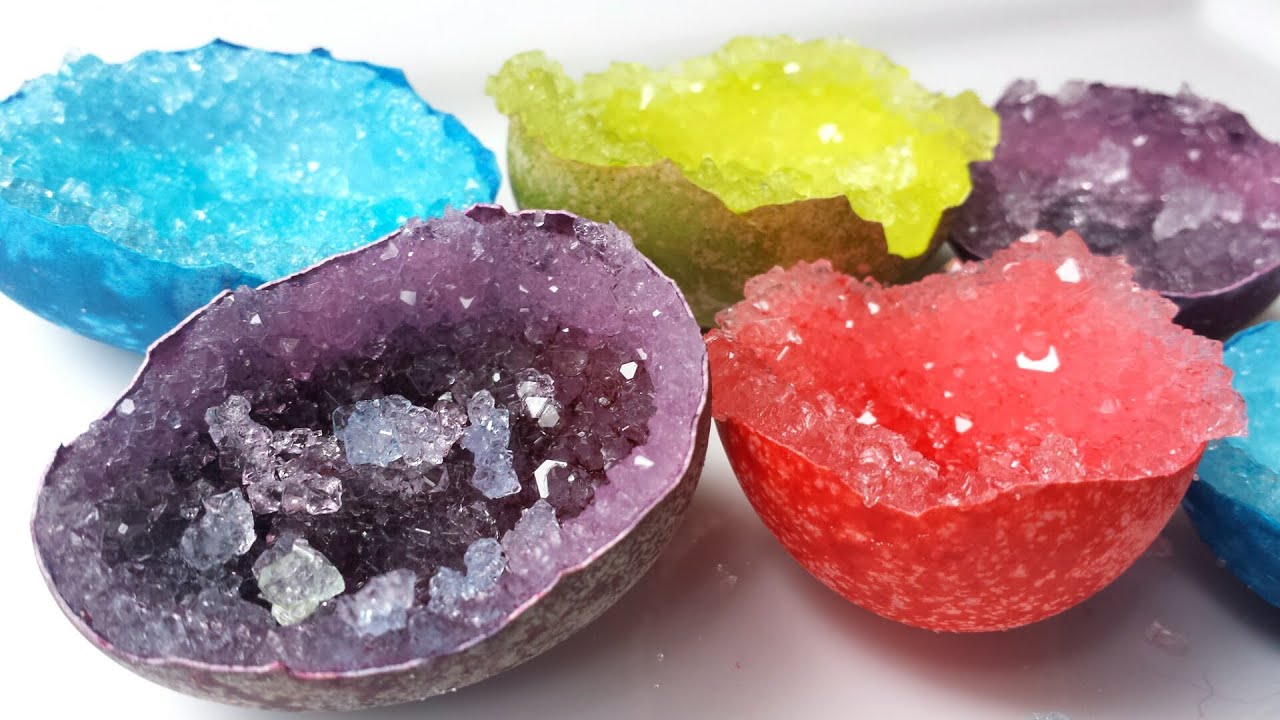
This one’s perfect for older kids or little scientists in the making. It’s a slightly longer activity, but the end result is a sparkly surprise that looks like real crystals! It’s a fun way to mix science with easy arts and crafts.
You’ll need:
- Empty egg shells
- An egg carton
- Craft glue
- Epsom salts
- Food colouring
- Toothpicks
- Hot water
Help your little one crack the egg at the narrow end and widen the opening until it gets to the size of a quarter. Empty it in a bowl and repeat with the rest of the eggs – don’t throw away the yolks as they make for a delicious frittata.
Set the shells in a bowl of hot water. Once rinsed, show your kids how to gently rub their thumb on the inside to loosen and remove the membrane.
Once the shells are dry, you can dye them or set them inside the carton. Brush the entire inside with a thin layer of glue and sprinkle Epsom salts. Let them dry over a few hours.
In the meantime, boil a cup of water and slowly add ½ cup of Epsom salts, stirring until they dissolve. Add small amounts of salt until it no longer dissolves, then stop.
The mixture should be thick but not slushy; carefully pour it into the shells using a small ladle, and fill to the top. Let your little one choose the food colouring and add a drop or so inside, gently stirring with a toothpick.
Now, it’s time to be patient. Place the shells at room temperature and check them daily. Gently break any hard, jagged layers forming on the surface with a toothpick to allow the water to evaporate. After the few days, your wonderful colourful geodes will appear!
Sock Monsters
Got a drawer full of odd socks? Turn them into wild and wacky sock monsters! This easy arts and crafts activity is perfect for sparking imaginative play, and it’s a brilliant way to reuse items you already have at home.
You’ll need:
- Clean odd socks
- Stuffing (cotton wool, fabric scraps, or rice)
- Felt or fabric for features
- Googly eyes or buttons
- Fabric glue or a needle and thread (for grown-up help)
Let your child choose their sock and fill it with stuffing to bring their monster to life. Once it’s plump, tie or sew the end shut. Then it’s time to get creative, add a big felt mouth, floppy arms, colourful patches, and mismatched eyes.
No two monsters will be the same, and that’s half the fun. These make great homemade toys or party take-home gifts too.
Make Magic Wands
Add a sprinkle of sparkle to your easy arts and crafts session with these fun DIY magic wands. Perfect for party crafts or rainy day fun, kids will love creating their own magical prop for pretend play, or to get invlved if you are having a magic party.
You’ll need:
- Wooden sticks or straws
- Card or foam sheets
- Ribbons, string or yarn
- Glitter, sequins, or stickers
- Glue and scissors
Start by cutting out a star, heart or lightning bolt shape from card or foam. Let your child decorate it however they like, the more sparkle the better! Once dry, glue or tape it securely to the top of the stick.
Add trailing ribbons or yarn underneath the shape for extra flair, and ta-da! A magical wand ready for spells, performances, or fairy dress-up.
Rainbow Rice Art
If you’re after a sensory-friendly, mess-friendly option, rainbow rice art is a colourful and calming choice. It’s one of the easiest arts and crafts ideas to set up and works brilliantly for younger kids.

You’ll need:
- Uncooked rice
- Food colouring
- Zip-top (freezer) bags
- Vinegar or hand sanitiser
- Baking paper or trays for drying
- Glue, card, and optional stencils
To colour the rice, pour around 1 cup into a freezer bag, add a few drops of food colouring and a teaspoon of vinegar or hand sanitiser. Seal and shake well until the colour is evenly spread. Then pour it onto a tray or baking paper to dry for a few hours.
Once dry, kids can use glue to draw shapes or letters on card, then sprinkle over the coloured rice to create bright, textured artwork. It’s a simple way to combine creativity with sensory play.
>> Book a Kid’s Arts and Crafts Party
PartyWizz helps you book the best kid’s entertainers and party services in UK and Ireland. From magicians and face painters to party packages and photographers, you’ll find those in your area on our easy-to-use platform. Whether you’re planning a birthday party, christening, communion or a corporate family day, go to PartyWizz to find the perfect service providers hassle-free!


